Choosing a SHINIC space heater starts with the place you want to warm. A compact ceramic heater, a portable milkhouse heater and a ceiling-mounted quartz heater create three different arrangements. The useful choice depends on how you occupy the space, where the appliance can safely operate and whether a suitable electrical connection is available.
Our range includes the FP442-15 ceramic heater, the compact blue FP218-15S ceramic model, the FW606-15CG milkhouse heater and the QGW15-602 ceiling quartz heater. This guide explains how to compare those formats without treating a product name or room-size claim as a complete heating plan. It also covers controls, operating costs, care and the questions to settle before installation.
Keep the exact model's instructions beside your room plan. Portable and mounted heaters have different requirements, and a location suitable for one may be unsuitable for another. Product features support correct use; they do not replace supervision, proper placement or an appropriate electrical supply.
1. Describe the heating task before choosing the heater
Start with when and where you feel cold. A person seated at a desk for an hour has a different routine from someone moving around a larger room. Write down the occupied area, the usual session length and whether the room already has central heat. This makes it easier to decide whether supplemental heating is a reasonable part of the solution.
Next, identify what changes during the session. A door may open repeatedly, a vehicle may enter a garage or a workbench may become covered with materials. Those changes affect whether the location remains appropriate. A heater should fit the real activity, including movement and storage, rather than an idealized empty-room photograph.
Consider whether a building problem is creating the discomfort. A persistent draft, an open door or an underperforming heating system deserves attention in its own right. Adding a portable appliance does not repair a damaged window seal or establish that the building's main heating is working correctly. Address those issues through the appropriate maintenance route.
For your shortlist, write a practical sentence such as “supplemental warmth while an adult uses this dry indoor room.” Then add the available floor or mounting position. If the position cannot meet the model's instructions, remove it from the shortlist before comparing controls, color or price.
2. Compare ceramic, milkhouse and quartz formats
A ceramic fan heater uses airflow to distribute heat from its heating element. Its compact form can make it convenient to relocate after it has been switched off and cooled. A milkhouse-style heater also uses a portable arrangement, with a different housing and intended-use profile. Read the actual model information rather than assuming that a more rugged appearance permits harsher conditions.
A quartz radiant heater places more emphasis on warmth directed toward the area in front of its heating elements. The ceiling-mounted QGW15-602 requires a suitable fixed installation. It is a different purchase decision from setting a portable heater on the floor, even when the electrical power ratings appear similar.
Choose the installation format first. A mounted heater may suit a planned location, but only after mounting, clearances and electrical requirements are resolved. A portable heater offers flexibility between suitable locations, but each move requires a new placement check. Neither format eliminates the need to keep the operating area appropriate for a hot electrical appliance.
| Format | Models to compare | Planning priority |
|---|---|---|
| Compact ceramic | FP442-15 and blue FP218-15S | Suitable floor position for occupied indoor use |
| Portable milkhouse | FW606-15CG | Permitted location, clear operating area and cord route |
| Ceiling quartz radiant | QGW15-602 | Approved mounting, clearances and electrical connection |
Use the SHINIC space heater collection for compact options and the garage heater collection to inspect the mounted and utility formats. The collection name is a starting point; the individual manual determines the permitted application.
3. Choose a ceramic model around the occupied room
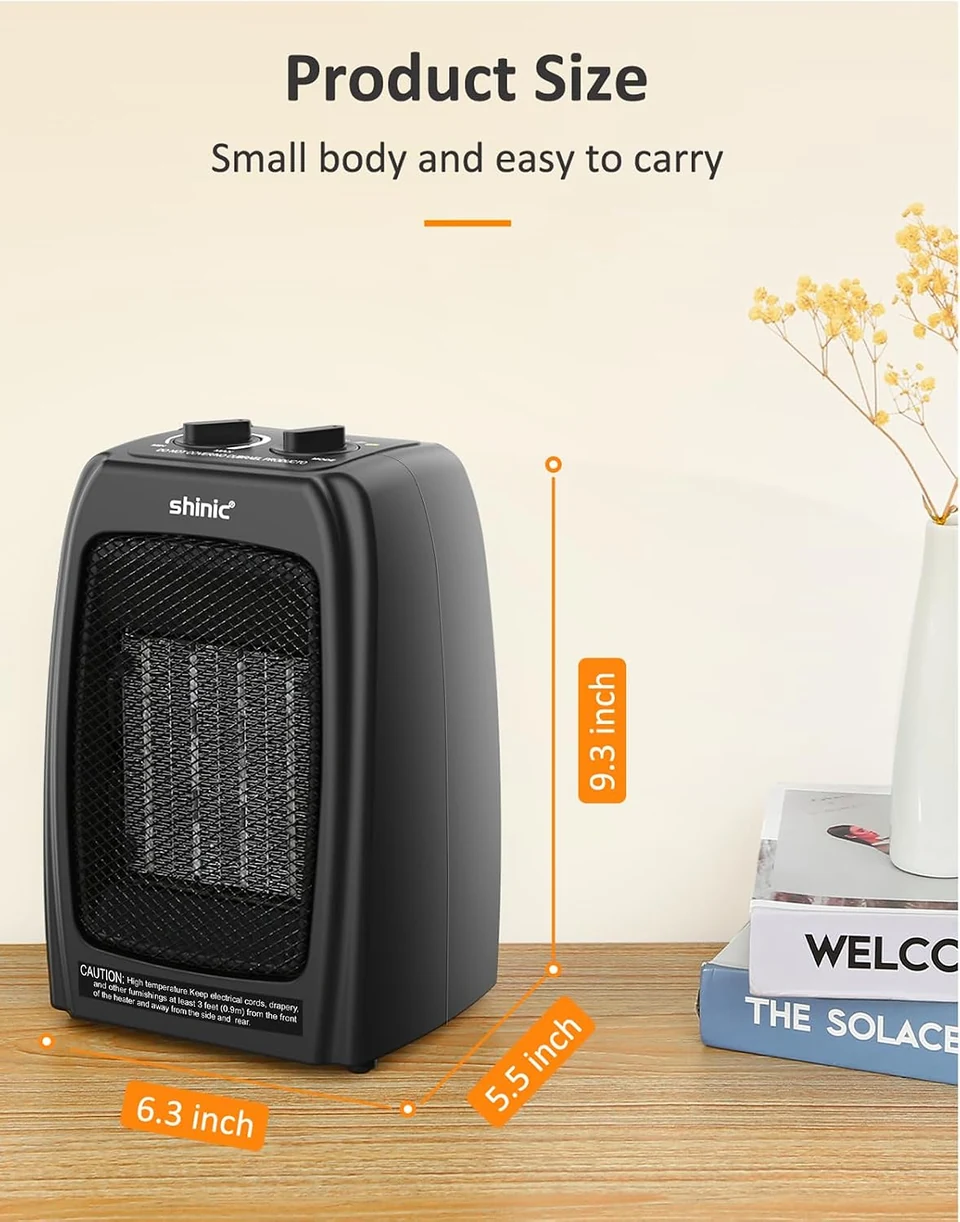
The FP442-15 and blue FP218-15S give you two compact ceramic formats to compare. Start with the complete dimensions and controls shown for the selected model. Compactness is useful only if the heater still has the required operating space. Do not interpret a small housing as permission to place it beneath a crowded desk or next to bedding.
The blue FP218-15S uses low heat at 900 watts and high heat at 1,500 watts. Keep those settings distinct from other ceramic models. Similar-looking appliances can have different low-power settings, switches or thermostat arrangements, so use the model name when comparing information.
Look at your normal seating position and the open floor area nearby. The heater should remain outside ordinary foot movements, chair travel and trailing clothing. A desk chair can move much farther backward during a call than when you first sit down. Include that movement in the placement plan rather than measuring only the empty space beside the desk.
Controls should be understandable before the first use. Identify the power selector separately from the thermostat and learn the shutdown sequence from the manual. If a household member will also use the heater, show them the controls and the permitted location. A familiar, consistent arrangement makes everyday operation simpler than repeatedly finding a new spot around furniture.
4. Treat a milkhouse heater as a specific appliance
The SHINIC FW606-15CG is a portable milkhouse-style fan-forced heater with 1,300-watt and 1,500-watt heat settings. The difference between those two settings is relatively modest, so select it for its actual format and controls rather than assuming that the lower setting is equivalent to a much smaller personal heater.
Words such as “utility” and “milkhouse” describe a product category; they do not make every workshop or garage an approved environment. A garage may contain gasoline, paints, solvents, dust or other materials incompatible with heater operation. A space that is dry and clear on one day may have a very different use the next.
Review both the appliance instructions and the activities planned for the location. Do not operate a heater where flammable vapors or hazardous dust could be present. If the area cannot provide suitable conditions, use a different heating plan rather than trying to compensate by moving the heater a little farther away.
For a permitted utility-room arrangement, think about the full work session. Where will tools be placed? Will a door swing into the appliance? Could someone set a carton beside it? Keep the planned location visible and consistent. The carrying handle helps with relocation only after shutdown and cooling as instructed; it is not a reason to move an operating heater around the room.
5. Plan ceiling quartz heat before buying
The QGW15-602 is a ceiling-mounted quartz radiant heater with 750-watt and 1,500-watt settings. Treat the mounting location as part of the product selection. The ceiling structure, nearby objects, orientation and electrical connection must all work with the exact installation instructions. A photograph of a heater above a work area cannot establish those conditions in your building.
Sketch the intended location from the side as well as from above. Include shelves, doors, tracks, lights and the tallest objects normally stored or moved beneath it. A clear view on installation day may become obstructed by a raised door, seasonal storage or equipment brought into the room later.
Use the manufacturer's stated clearances for the mounted appliance. Do not substitute a portable-heater clearance rule or estimate the installation height from a product photograph. If the instructions, ceiling structure or power requirements are unclear, have a qualified installer or electrician assess the arrangement before installation.
Radiant warmth is directional, so the occupied position matters. Consider where you stand or sit during the task and whether objects interrupt the intended area. The correct mounting design comes first; never alter the bracket, suspension method or electrical connection to chase a more convenient angle. Once installed, keep the manual and model information accessible for later maintenance and inspection.
6. Look beyond a room-size number
Two rooms with the same floor area can behave very differently. Ceiling height, insulation, windows, outdoor conditions and open doorways all affect how much heat is needed. A room-size claim cannot capture every combination. Use it as one piece of product information, not a guarantee that a selected heater will maintain a particular temperature in your home.
Write down the room's length and width, then note features that change the situation: a high ceiling, large glazing area, an adjoining unheated space or frequent door opening. Include the existing heating system and the amount of supplemental warmth you actually need. This creates a more useful comparison than floor area alone.
Separate the expectation of a warmer occupied area from the expectation of heating an entire building. A short seated activity and continuous whole-room temperature control are not interchangeable tasks. If you need reliable heating for a large or difficult space, have the heating requirement assessed rather than adding several portable appliances by trial and error.
| Room condition | Question to ask | Why it changes the decision |
|---|---|---|
| High ceiling | How much space is above the occupied area? | Floor area alone misses room volume |
| Frequent door opening | Will the room remain enclosed during use? | Conditions change throughout the session |
| Existing central heat | Is the heater supplemental? | The task differs from primary heating |
| Fixed work position | Where will the person spend time? | Placement matters alongside output |
Keep these notes with your measurements so you can compare options consistently rather than changing the assumptions for each product.
7. Give portable heaters a clear operating area
The Consumer Product Safety Commission advises keeping portable heaters at least three feet from combustible items such as furniture, bedding and curtains. Follow the selected model's instructions wherever they require more space. Put portable heaters on a firm, level floor in a permitted location, away from movement that could knock them over.
Make the clearance visible in your room plan. Include curtains in their hanging position, not tied back for a photograph, and bedding as it is actually used. Check the reach of a swivel chair and the place where a bag or coat is usually dropped. A location is useful only if ordinary activity can preserve the required space.
Do not use a portable heater as a clothes dryer, footrest or shelf. Do not put it on furniture to bring it closer to you. Keep children and pets away from the operating appliance and its cord. If a household cannot maintain a suitable clear area, select another way to heat the space.
Before every session, take a quick look at the surroundings. A shopping bag, blanket or delivery carton can appear after the last use. This is especially important in rooms that serve several purposes. A reliable placement routine should be easy enough to repeat without measuring the room from scratch, while still noticing what has changed.
8. Settle the electrical connection before the first use
For a portable electric heater, CPSC advises a direct connection to a wall outlet, never an extension cord or power strip. A convenient-looking location across the room is unsuitable if it depends on extending the cable. Keep the cord out of walkways and away from places where furniture can pinch it.
Read the electrical rating and plug requirements for the exact model. Do not assume every appliance in a heating collection uses the same connection. A different plug or voltage requirement is not a problem to solve with an improvised adapter. Have a qualified electrician assess any uncertainty about the outlet, circuit or installation.
The U.S. Fire Administration's guidance calls for inspecting cords, plugs and connections and using a secure outlet fit. A loose connection, damaged insulation or a plug or outlet becoming very hot needs attention from a qualified professional. Stop use rather than repeatedly resetting a breaker or moving the same problem to another improvised connection.
| Check | Acceptable planning result | If it does not work |
|---|---|---|
| Connection | Correct outlet and rating for the exact model | Ask a qualified electrician |
| Cord route | No stretching, crushing or foot traffic | Choose another suitable position |
| Cord and plug | No visible damage or loose connection | Stop use and follow service instructions |
| Mounted installation | Manual-compliant supply and mounting | Resolve installation before operation |
Keep the electrical plan separate from the furniture plan until both are complete. A heater must satisfy both, not merely fit the empty corner.
9. Understand what each control actually changes
A heat-setting control and a thermostat perform different jobs. The heat setting selects an operating level provided by the appliance. The thermostat responds to temperature according to the model's design. Turning a thermostat farther does not create an additional wattage setting beyond those the appliance provides.
Learn the controls while the heater is off. Identify the off position, the available heat levels and any separate fan-only setting shown in the manual. If a control uses a graduated dial rather than a temperature display, do not read exact room temperatures into the markings. Use it as the manufacturer describes.
Start with the operating sequence in the instructions, then make small adjustments while you remain present. Allow time to understand the result before changing another control. Constantly moving both the selector and thermostat makes it harder to determine which setting suits the room.
A thermostat, timer or protective shutoff is not permission to leave the heater unattended. CPSC says not to leave portable heaters running while sleeping. The Texas Department of Insurance also advises switching them off before leaving the room. Make shutdown part of the routine when an activity ends, rather than relying on the appliance to decide whether someone is still there.
If controls behave unexpectedly or the heater repeatedly stops in a way the manual does not explain, stop using it and follow the service instructions. Do not bypass a switch, sensor or protective function.
10. Estimate electricity use with your own routine
Rated power helps you make a simple estimate, but it is not the same as a measured energy bill. Convert watts to kilowatts by dividing by 1,000. Multiply kilowatts by the hours the heating element actually operates, then multiply by your electricity rate. Use the rate on your bill, including the relevant per-unit charges.
For example, a 1,500-watt setting is 1.5 kilowatts. Four hours of continuous operation would use 6 kilowatt-hours. At an illustrative rate of $0.18 per kilowatt-hour, that would cost $1.08. These are arithmetic examples, not a quoted utility rate, a measured SHINIC consumption result or a prediction of thermostat cycling.
A thermostat may reduce the time the heating element operates, but the amount depends on the room and setting. A lower heat setting changes the rated operating level; it does not automatically mean the same room will reach the same condition in the same time. Compare a realistic routine rather than choosing the smallest number without context.
Write down how often you intend to use the heater and for how long. Occasional supplemental use and daily extended use lead to different costs. If the plan is to replace a home's main heating with several portable units, assess the building and heating system properly. Product price alone cannot tell you which overall heating arrangement will cost less.
11. Check the model label and certification information
Keep the exact model name at the center of your checks. Product families can include different electrical ratings, heating elements and controls. A certificate or manual for a similar-looking appliance is not enough to establish the details of the one you intend to use. Match the model on the product page, packaging, appliance label and instructions.
Intertek explains that the ETL Listed mark identifies a product tested and certified to applicable safety standards. Its directory allows searches by manufacturer, model or standard. A certification mark concerns the listed product and scope; it does not establish suitability for every location, prove a particular room coverage or remove the need to follow operating instructions.
When you receive the heater, keep a readable record of the model and electrical label together with the receipt and manual. That makes later questions about parts, operating settings or service much easier to resolve. You will be able to identify the appliance precisely instead of describing it only by color or size.
If information conflicts, pause before use and ask the seller or manufacturer to clarify the exact model. For example, a ceramic heater and a quartz radiant heater should not be treated as interchangeable because a comparison table uses a loose category name. The appliance's own identity and instructions should guide your decision. Do not change wiring, replace safety parts with improvised alternatives or use an unrelated manual to resolve uncertainty.
12. Keep maintenance simple and model-specific
Switch off, unplug where applicable and let the appliance cool before cleaning or moving it, following its instructions. Inspect the accessible exterior, cord and plug. Clean only the surfaces and parts the manual permits, using the specified method. Do not open electrical housings or spray liquids into grilles and controls.
Keep air openings clear during use. If the model has a removable serviceable filter or other owner-maintenance part, follow its particular procedure; do not assume every heater in the range shares it. A picture of a removable grille does not establish that it is intended to be removed by the owner.
For seasonal storage, wait until the appliance is clean, cool and dry. Protect the cord from sharp bends and crushing, and keep the heater where it cannot be damaged by stacked items. Store the manual and any permitted removable parts together. Before the next season, check the model and available recall information as part of bringing it back into service.
A ceiling-mounted heater needs its own inspection and cleaning routine, including safe access. Do not climb on furniture or work around a connected hot appliance to reach it. Arrange qualified help when the task requires it. Good maintenance is a repeatable process based on the actual model, rather than a collection of improvised fixes after something stops working.
13. Make the final choice with a location check
Put the three decisions together: the heating task, the permitted location and the electrical connection. A model belongs on the shortlist only when all three agree. Then compare the practical details that make everyday use easier, such as understandable controls, suitable dimensions and a manageable shutdown and storage routine.
For compact indoor supplemental heating, compare the FP442-15 and blue FP218-15S with your measured floor location. For a portable utility format, examine the FW606-15CG's instructions against the actual environment. For ceiling quartz heat, resolve the QGW15-602 installation before purchase. Avoid treating a collection label as approval for every room of that type.
Revisit the plan when the room changes. New shelving, a different desk or seasonal storage can remove a previously suitable location. If you also need airflow during warmer months, our fan placement guide explains tabletop and pedestal choices, while the window fan guide covers compatible openings and ventilation planning.
Choose the heater whose correct setup fits your routine. Clear instructions, an appropriate location and a deliberate shutdown habit matter every time you use it.